GUIDE · SVG TO PNG
How to Convert SVG to PNG
SVG and PNG are built for opposite jobs. SVG is a vector format: the file is a text description of shapes, lines, and curves, so a logo stays perfectly sharp at any size — 16 pixels or 16 feet, it looks the same. PNG is a raster format: the file is a fixed grid of pixels, so it has one size, and enlarging it past that size makes it blurry.
That difference is exactly why people convert SVG to PNG. The vector file is the master copy, but many places still do not accept it: website upload forms, email clients, social media posts, chat apps, document editors, and print services often want a plain image file. PNG works everywhere, and unlike JPG it keeps transparency — a logo with no background stays background-free after conversion.
SVG support in built-in viewers varies by app and operating-system version, so the Preview and Paint tricks from our other guides are not a reliable SVG workflow. Use a browser converter, a vector editor, or the design app the SVG came from. The first two methods below work without signup or server uploads; the third uses your existing design-app access.
SVG vs PNG at a glance
| SVG | PNG | |
|---|---|---|
| How it stores the picture | Math: shapes and paths as text | Pixels: a fixed grid |
| Scaling | Infinite, no quality loss | Fixed size; enlarging blurs |
| Transparency | Yes | Yes (alpha channel) |
| File size | Tiny for logos and icons | Grows with dimensions |
| Best for | Logos, icons, illustrations | Sharing, uploading, printing |
Swipe or scroll sideways to see all columns.
Method 1: Convert in your browser (batch, size control, ZIP downloads)
For most people this is the fastest way, and it works the same on Windows, Mac, and Linux. SVG to PNG converter renders your SVG files locally in the browser — nothing is uploaded to any server.
- Open the converter in Chrome, Edge, Safari, or Firefox.
- Drag in your .svg files — you can drop dozens at once.
- Set the output size. This is the one setting that matters: the PNG is rendered at exactly the width and height you choose. Export at 2× (or more) the size you will display it at — a logo shown at 200px wide should be exported at 400px or wider, so it stays sharp on high-resolution screens. If your SVG has no width and height set, the converter uses its viewBox size as the starting point.
- Click convert. Transparent areas stay transparent: PNG keeps the alpha channel, so a logo with no background comes out with no background.
- Download each PNG individually or grab them all as a ZIP.
- If neither SVG dimensions nor a valid viewBox is available, start with the visible 512 × 512 px default. All files in a batch use the selected export dimensions. Keep each side at 8,192 px or less and the total at 16,777,216 pixels or less; your device may need a smaller export.
No signup, no watermark, no daily limit. PicUplift sets no conversion-count cap and processes large batches one image at a time. Actual capacity still depends on your device's memory, image dimensions, and browser; split very large folders into smaller batches if needed.
If the PNG files come out larger than you expected, that is normal: a simple logo as SVG can be a few kilobytes, while the same logo as a PNG at 1000px wide is much bigger, because PNG stores every pixel. If file size matters, export at the smallest dimensions you actually need — or shrink the PNG afterwards with image compressor.
If your file is a WebP photo rather than an SVG, use WebP to JPG converter instead. If it is an iPhone photo, it is probably HEIC — use HEIC to PNG converter.
SVG to PNG: the same logo, transparency retained.
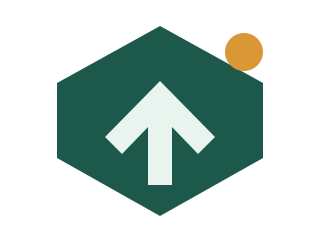
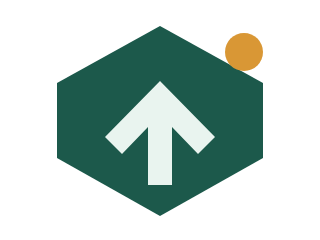
The same transparent logo, before and after a real browser conversion. The PNG is a fixed grid of pixels; the SVG remains the scalable master.
Method 2: Use Inkscape (free, on Windows, Mac, and Linux)
Inkscape is a free, open-source vector editor for Windows, Mac, and Linux. It supports exact export dimensions and command-line batch workflows.
- Download and install Inkscape (free) from inkscape.org.
- Open your SVG file in Inkscape.
- Go to File → Export (called Export PNG Image in older versions) (or press Shift+Ctrl+E).
- Choose the export area — Page, Drawing, or Selection — and set the Width and Height. As in Method 1, export larger than you need: 2× your display size is a good rule.
- Click Export.
For one logo this takes seconds. For a folder of SVGs, Inkscape can also run from the command line: inkscape input.svg --export-type=png --export-filename=output.png exports one file, and the same command in a loop handles a whole folder. You do not need the command line for occasional conversions — the graphical export above is enough.
One thing to watch: if your SVG uses text, Inkscape renders it with the fonts installed on your computer. If a font is missing, the text may look different from the original. For a logo you plan to share widely, convert the text to paths first (in Inkscape: select the text, then Path → Object to Path) — then the letter shapes no longer depend on installed fonts.
Method 3: Export from the design app the SVG came from
Figma, Illustrator, and Canva can export PNG directly. This is often convenient if you already have the original design open. This route uses your existing account and app license; it is not a promise that every design app or transparency feature is free. Online design apps follow their own upload and privacy policies.
- Figma: select the frame or layer, find Export in the right panel, choose PNG, set the scale to 2× or 3×, and click Export.
- Illustrator: go to File → Export → Export As, choose PNG, and set the resolution (use 300 PPI for print, check actual pixel dimensions for screens and choose Transparent as the PNG background).
- Canva: click Share → Download, choose PNG as the file type, and download. Transparent-background download requires an eligible Canva plan; it is not included in Canva Free.
This method is best when you want the PNG to match the design exactly, because the app that drew the SVG renders it. The catch is that you need the original design file — if all you have is the exported .svg file, use Method 1 or 2 instead.
Which method should you pick?
- Dozens of SVG files, size control, ZIP downloads, or a cross-platform workflow → Method 1 (browser converter; batch capacity depends on your device).
- Exact sizes, batch jobs from the command line, or text that must render identically → Method 2 (Inkscape, free on all platforms).
- You still have the original design open in Figma, Illustrator, or Canva → Method 3 (export directly, nothing else to install).
- Transparency must survive → PNG supports transparency; use a transparent export background and check the app’s settings and plan. PicUplift defaults to transparent. Just do not convert to JPG — JPG has no transparency at all.
- Smallest possible files for sharing → Export at the exact display size (not larger), then compress the PNG with the image compressor linked in Method 1.
FAQ
Will converting SVG to PNG lose quality?
No, not at the size you export. PNG is a lossless format, so the rendered pixels are kept exactly. Quality is decided by the export dimensions: a PNG exported at 400px wide looks perfect at 400px and below, but blurry if you stretch it to 1000px. Export at 2× your display size and the result stays sharp.
Does the PNG keep the transparent background?
Yes, if the SVG has no background. PNG supports transparency, so a logo drawn with no background rect comes out with a transparent background. If your SVG does have a background rectangle — white or any other color — the PNG keeps that background, because it is part of the picture.
What size should I export my SVG at?
Export at 2× the size you will display it at, or larger. A logo shown at 200px wide should be exported at 400px or more; an icon shown at 32px should be exported at 64px or more. Larger exports only cost file size, and you can always shrink a PNG afterwards — you cannot add sharpness back to one exported too small.
Why is my PNG bigger than the original SVG?
Because the two formats store completely different things. An SVG logo is a short text description of a few shapes, often just a few kilobytes. A PNG stores every pixel of the rendered picture, so its size grows with the export dimensions. That is expected. If the file is too big, export at smaller dimensions or run it through an image compressor.
Is it safe to use an online converter for my files?
Many converters upload files to their servers. PicUplift processes files in your browser and never uploads them. The converter and its bundled sample load from this site; conversion itself needs no server request. For offline use, download the complete website folder, keep its assets folder, and open svg-to-png.html locally. We use Google Analytics to measure visits and interactions (such as page views, scrolling, and clicks). Images are always processed locally and are never uploaded.